Sorry no picture. Will take some when I go down next.
Since I am putting in the same size replacement tank, I decided not to remove the forward bulkhead in the bilge.
I put four holes in this bulkhead to assist drainage. Then I started to attack the bulkhead that seperates the fuel tank and lowest portion of the bilge. I drilled some holes then got to work with my sawzall. Soon I saw some sparks fly and discovered I had cut the wiring to the bilge pump.
Anyways I now have a fairly big hole and I can see what is going on underneath the engine.
The next trip down I will cut out some more of the bulkhead and figure out how to remove the fiberglass pan under the engine. I will also repair the wiring to the bilge pump and install a new float switch.
The weather in Skagway was fairly warm, above zero with a very strong gusty wind blowing. ( 30-40 knots )
Saturday, December 10, 2011
Monday, October 17, 2011
Fuel Tank Update
When I got the tank home I ground all the rust off the outside. There was a pin sized hole in the lowest corner. Thankfully it was very gummed up with rust and gunk and probably leaked very little. Anyways it is good to know I have isolated a potentially disastrous leak. Now on to designing and making a new tank.
Thursday, October 13, 2011
Removing the fuel tank
Today with the help of Glenn and George, I pumped out the fuel tank and removed it from the boat. I would say this job was long overdue. It was fairly easy to remove once the fuel was pumped out and filtered.
Maybe about half an hour to get everything disconnected it and another half an hour for three people to heave it out.
I wasn't able to get a good picture of the portion of the bilge where it was sitting. It is a mess of rust sludge and chipped paint. Next trip I will clean things out and start figuring out how to cut out the bulkheads.
It feels good to have this ticking time bomb out of my bilge and start working towards a new tank.
Wednesday, October 5, 2011
Roller Furler Fixed
Along with Ken and Glenn, I took down the forestay with furler attached and hammered out the kink in the connector. I had bought a new connector but was unable to use it because of the way the stay and furler had been assembled. Anyways we got the old one apart and we were able to hammer it straight and reassemble things. It is a little sticky in that joint but things work.
Now on to deal with various electrical issues.
Now on to deal with various electrical issues.
Friday, August 5, 2011
Refinishing Outside Teak
Yammy and I went down to Skagway for five days. We started the gargantuan task of refinishing the outside wood.

We refinished the cap rail with Cetol Marine Light.
Here are the cabin sides with multi layers of cetol removed. We started off using a paint remover then discovered that using a heat gun worked better.After the heat gun we would use paint remover if necessary do a little sanding and then apply a one part brigtener.
This is what the old wood looked like.
The old cabin sides.
Here it is stripped and covered with one coat of Cetol Marine Light.
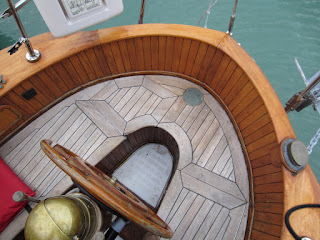
Some nice views of the cockpit. We still haven't done the upper sides of the cockpit and of course the teak deck is crying out for some attention.
Thursday, July 14, 2011
Pictures of Ginger Lady Sailing near Haines
I asked Glenn and Kathy to take some pictures of the boat sailing. We were about 20 miles South of Haines. Here are the results.

After going to the trouble of sewing on luff tape to the old jib and drifter, so that I could hoist them on the furler, I was hoping to try them out. Much to my dismay there was no halyard to the Genoa. It was tied to the top of the mast with a piece of 3 strand rope. Here I am at the top of the mast installing the halyard.
Pictures of the the boat sailing as a cutter rig and with the drifter will have to wait for the next time I can coerce someone into taking pictures.
Subscribe to:
Comments (Atom)


