Wednesday, July 24, 2013

Another long night on the grid.

Spent the night of July 22nd on the grid.
I went on at 0100. The boat touched down about 2 hrs later and I started working on it at 0430. Didn't get much sleep but the boat got pressure sprayed, painted, zinc replaced and hopefully knotmeter fixed.


Kite photos of Ginger Lady

My latest interest is taking aerial pictures from kites. Here are a few pictures of Ginger Lady sailing on the Lynn Canal near Eldred Rock. The other boat in the pictures is Dijon a Rawson 30 PH owned by Glenn and Kathy.


Friday, October 19, 2012

2012 Summer Sail Trip


I was so entranced by my various projects on the boat that I forgot about our month long sailing trip.
Here is a summary:

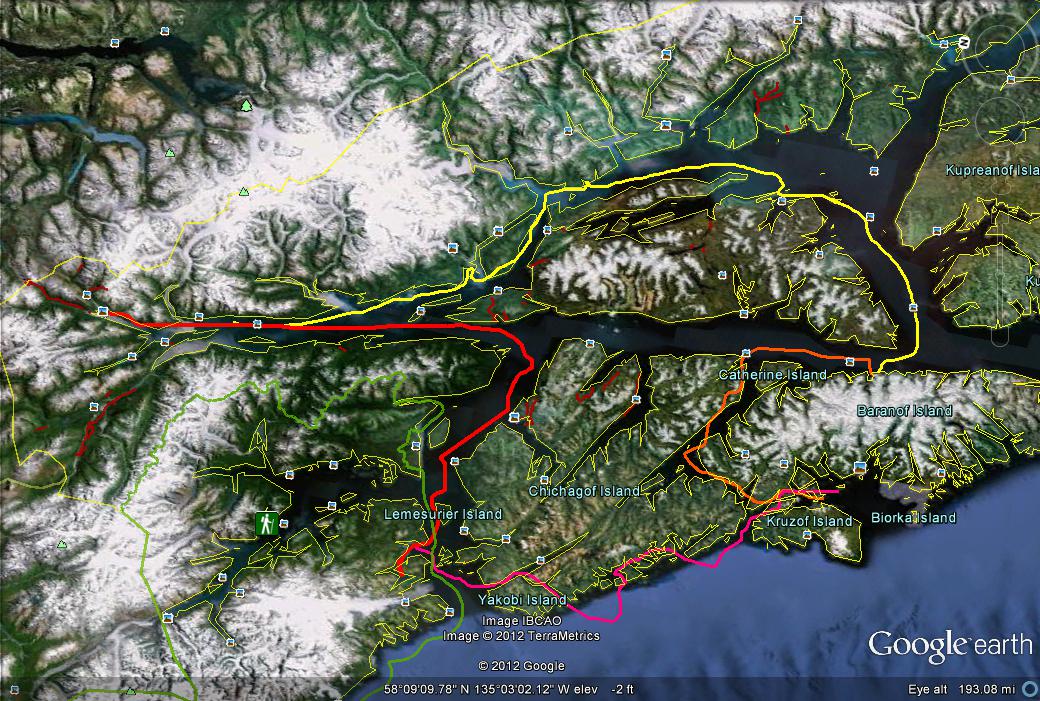
Down the Lynn Canal and Icy Strait to Dundas Bay
Outside of Chichagof Island to Sitka
Then back through Peril Strait and out to Warm Springs Bay
Down Stephen's Passage to Juneau and then home

The highlight was Dundas Bay.The flowers were something else and our hiking trip to the foot of the Brady Glacier was amazing.
The sailing sucked. We were either becalmed or going right into it most of the time.
No real adventure here. Most of the route I have done multiple times and have been in almost all the same anchorages.

Here are some pictures:

https://photos.google.com/album/AF1QipMPa3dWfUu7Y3b9I_nBMB5KIsv-sdBQmdb8YGuH

Monday, August 20, 2012

Refinishing outside wood on Ginger Lady

 Last week Yammy and I spent 5 days stripping off old cetol and putting three coats on. We also oil sealed a few pieces including inside the cockpit.


Tuesday, July 3, 2012

A few electrical modifications.

In an effort to simplify my electrical system and get it to the point where I understand it, I have removed a few components and the associated wiring. Just back from Skagway today. I completed the new switching arrangement. Unfortunately I forgot to take a picture of it.
Here is a picture of some of the stuff I took out of the boat. I also removed battery bank #2 a 168 pound 8D battery that was residing under my cockpit locker. It was fried and was dragging the rest of the system down with it.
Anyways there are still a couple of gremlins at work in the system and it will take a little more troubleshooting to get it running to my satisfaction.

Sunday, June 24, 2012

Electrical Clean Up

I was too exhausted after ripping wiring and various other components out of my boat to take any pictures.
I will snap some pictures of all the stuff on my next visit.
In a nutshell. Nothing seemed to work right. The Amp Hr Meter, the Three Stage Voltage Regulator, the isolator and alternator sensor. To cap things off my batteries were not charging at the same rate and my starting battery was discharging while I was away from the boat.
Turns out that by battery bank two was toast. After much experimentation and ripping things apart I discovered that whoever installed the new Yanmar engine did not make any effort to integrate with the existing electrical system. The system was charging using the internal regulator in the alternator and not the 3 stage external regulator. The starter was wired directly to the starting battery with no switch. The rest of the switching arrangement doesn't seem to make much sense. Anyways after two days of hard work I have an enormous pile of surplus wiring, electrical components and battery cable lying in my cockpit.
Miraculously I have the system up and running adequately. I have a good 8d battery as a bank and a good starter battery, things are charging adequately and there is a switching arrangement I can understand.
The boat is about 200 pounds lighter.

I have a new alternator regulator kit ordered.
I am in the process of obtaining four trojan 6 volt batteries which will be my house bank.

I will install all that when we get back from our July sailing trip.

Oh and the electrical clean up will also continue when I get back. I suspect there are still a few miles of wiring that doesn't do anything.

Tuesday, March 13, 2012

Fuel Tank is Installed

I don't have any pictures yet. The new fuel tank is hooked up and everything seems fine. I filled it up with 26 U.S gallons. I was hoping for more capacity but that is probably very close to what the old tank held.
That translates to 23 gal ( to be safe ) = 46 hrs motoring = 230 mile range with no sailing.
I removed a bunch of old wiring. There was enough to fill a garbage bag. None of it seemed to be doing anything. For sure some of it was left over from the previous engine installation. I still have to reroute some plumbing and secure some wiring around the tank. I also have to wedge it in place so it can't shift.

Next I have to start the engine and test the three stage regulator to see if it needs replacing.

Saturday, January 28, 2012

Fuel Tank Almost Finished

I am so proud of my new fuel tank. I have decided to keep it my office so that I can admire it every day.
There is still some work to do on the fuel fittings.That black stuff is truck bed liner. Am not sure that it will work out. So I have to order a new fuel fill fitting then finish working on the space it goes into and install it.
Then I am back in business.

Posted by Picasa

Saturday, January 21, 2012

Working on the new fuel tank

I am having Paul Baker of Snowdrift Designs make my new fuel tank.
Here he is cutting the parts of the tank with a plasma cutter.

I

This is Paul welding the tank together.


Unfortunately we didn't have time to finish the tank. Hopefully next week I will have some pictures of the finished project.
Posted by Picasa

Saturday, January 7, 2012

Making some real progress, just kidding.

Have been working away with my reciprocating saw and multicrafter tool. As you can see it is real refined work.

Getting the pan out from under the engine is a bit of a chore. There is a battery cable clipped to its underside. There is also some other wiring that I am trying to avoid. At least I have removed the non functioning  float switch and figured out the triple bilge pump system.


Next trip down I will come better prepared to wallow in the bilge. I will finish removing the oil pan and rewire the bilge pump and clean things up in preparation for the installation of the yet to be built fuel tank.
Posted by Picasa

Saturday, December 10, 2011

Cutting out the fuel tank bulkheads

Sorry no picture. Will take some when I go down next.
Since I am putting in the same size replacement tank, I decided not to remove the forward bulkhead in the bilge.
I put four holes in this bulkhead to assist drainage. Then I started to attack the bulkhead that seperates the fuel tank and lowest portion of the bilge. I drilled some holes then got to work with my sawzall. Soon I saw some sparks fly and discovered I had cut the wiring to the bilge pump.
Anyways I now have a fairly big hole and I can see what is going on underneath the engine.
The next trip down I will cut out some more of the bulkhead and figure out how to remove the fiberglass pan under the engine. I will also repair the wiring to the bilge pump and install a new float switch.
The weather in Skagway was fairly warm, above zero with a very strong gusty wind blowing. ( 30-40 knots )

Monday, October 17, 2011

Fuel Tank Update

When I got the tank home I ground all the rust off the outside. There was a pin sized hole in the lowest corner. Thankfully it was very gummed up with rust and gunk and probably leaked very little. Anyways it is good to know I have isolated a potentially disastrous leak. Now on to designing and making a new tank.

Thursday, October 13, 2011

Removing the fuel tank

Today with the help of Glenn and George, I pumped out the fuel tank and removed it from the boat. I would say this job was long overdue. It was fairly easy to remove once the fuel was pumped out and filtered.
Maybe about half an hour to get everything disconnected it and another half an hour for three people to heave it out.


I wasn't able to get a good picture of the portion of the bilge where it was sitting. It is a mess of rust sludge and chipped paint. Next trip I will clean things out and start figuring out how to cut out the bulkheads.
It feels good to have this ticking time bomb out of my bilge and start working towards a new tank.


Posted by Picasa

Wednesday, October 5, 2011

Roller Furler Fixed

Along with Ken and Glenn, I took down the forestay with furler attached and hammered out the kink in the connector. I had bought a new connector but was unable to use it because of the way the stay and furler had been assembled. Anyways we got the old one apart and we were able to hammer it straight and reassemble things. It is a little sticky in that joint but things work.
Now on to deal with various electrical issues.

Friday, August 5, 2011

Refinishing Outside Teak


Yammy and I went down to Skagway for five days. We started the gargantuan task of refinishing the outside wood.
This is inside the cockpit well. We brightened the weathered wood and applied an oil sealer.

We refinished the cap rail with Cetol Marine Light.

Here are the cabin sides with multi layers of cetol removed. We started off using a paint remover then discovered that using a heat gun worked better.After the heat gun we would use paint remover if necessary do a little sanding and then apply a one part brigtener.


This is what the old wood looked like.

The old cabin sides.

Here it is stripped and covered with one coat of Cetol Marine Light.


Some nice views of the cockpit.  We still haven't done the upper sides of the cockpit and of course the teak deck is crying out for some attention.

Anyways on Thursday it started raining so we gave it up for awhile.

Posted by Picasa

Thursday, July 14, 2011

Pictures of Ginger Lady Sailing near Haines


I asked Glenn and Kathy to take some pictures of the boat sailing. We were about 20 miles South of Haines. Here are the results.


After going to the trouble of sewing on luff tape to the old jib and drifter, so that I could hoist them on the furler,  I was hoping to try them out. Much to my dismay there was no halyard to the Genoa. It was tied to the top of the mast with a piece of 3 strand rope. Here I am at the top of the mast installing the halyard.
Pictures of the the boat sailing as a cutter rig and with the drifter will have to wait for the next time I can coerce someone into taking pictures.

Posted by Picasa

Friday, December 3, 2010

Buying the Boat


When I headed to Vancouver I was set on buying a Saturna 33. The price was right and I thought I could live with some of the features that didn't fit into the criteria I had for buying a boat.
  • It should fit in my berth in Skagway
  • Be able to go on the grid 
  • Be able to be hauled in Skagway
  • Be a more seaworthy boat than my last boat, a Fortune 30
  • Sail better
Anyways the Saturna 33 was a bust. The engine and everything back there called for replacement.
While we were in Blaine the broker showed us a beautifully maintained Cal 35. Very good value for the money but didn't really fit the above criteria.

On to Bremerton where we made an offer on Ginger Lady a Baba 30. Our offer reflected the duty and gst that we would have to pay when we moved it into Canada. Much to my surprise the offer was accepted. Next we hauled the boat and had it surveyed and then forked out the insurance and moorage for 5 months and promptly flew back to the Yukon.
It is not the best situation to have your boat 1200 miles away.


Anyways we will be back in Feb to get the boat ready and again around the second week of April to sail it North to Skagway.